
Important Notes
Any changes you make to your domain can take up to 24 hours due to DNS propagation. This also includes the DNS cache that is stored on your computer. Please wait at least 24 hours and restart your computer before contacting support about a domain not directing properly to your Landing Page Promoter campaign.
You can also use MX Toolbox to check and see if your DNS changes have propagated.
Instructions
When setting up your Landing Page Promoter campaign's you have two different options:
- You can use our domain (landingpagepromoter.com). In this case you will select a subdomain and a URL path. For example: subdomain.landingpagepromoter.com/your-url-path (ie. offer.landingpagepromoter.com/glow-moon). You can select anything you want for your subdomain and URL path (as long as no other user has the exact same match).
- You can use your own domain with a custom subdomain. This is exactly the same process as option one except you use your own domain. To set this up you must go to your DNS provider where you domain is registered and point you chosen subdomain to the URL we provide you.
Step 1: Add a custom domain to your Landing Page Promoter account
The first thing you need to do is go to your Settings.

Click Add New Custom Domain.

Fill out your Subdomain. This can be anything. We recommend using something like 'offer', 'shop', 'deal', 'store' etc.
Type in your Domain. You must have registered and have control over this domain
When completed click Submit Domain.

A popup like the one below will display. Make sure you do not close the window.
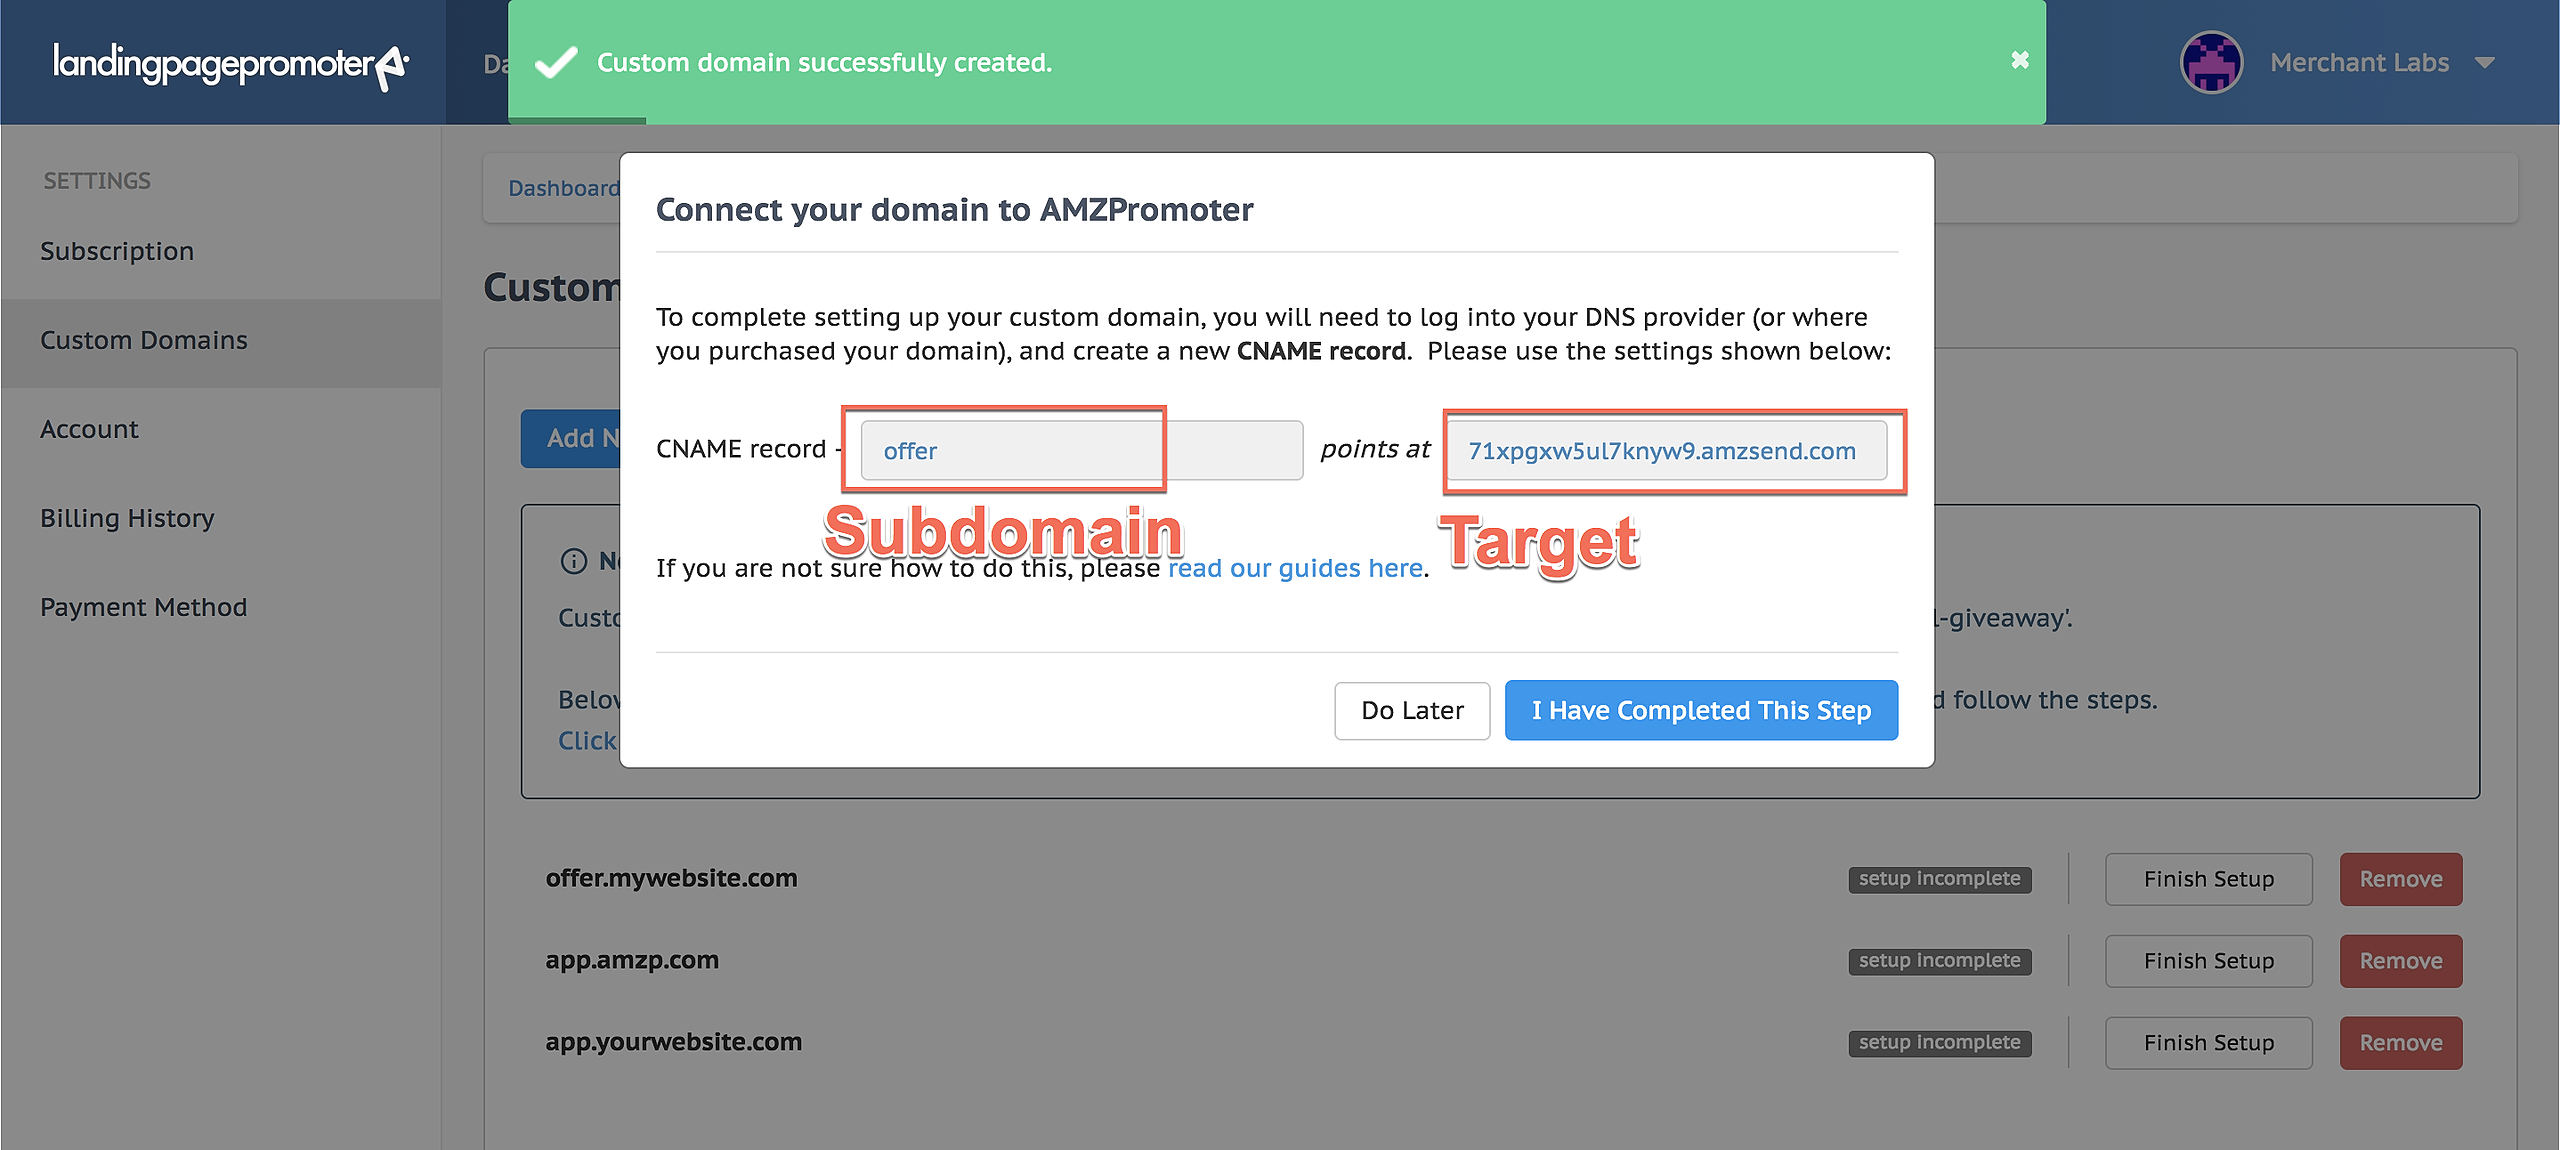
Now you will need to login to your domain registrar (or where you control the DNS settings of the domain you used). You will need to create a CNAME record and point the Subdomain to the Target URL provided.
(NOTE: Each DNS provider will have a slightly different way of redirecting a subdomain. Please contact your provider and link them this article if you are having trouble. They will be able to sort it out for you.)
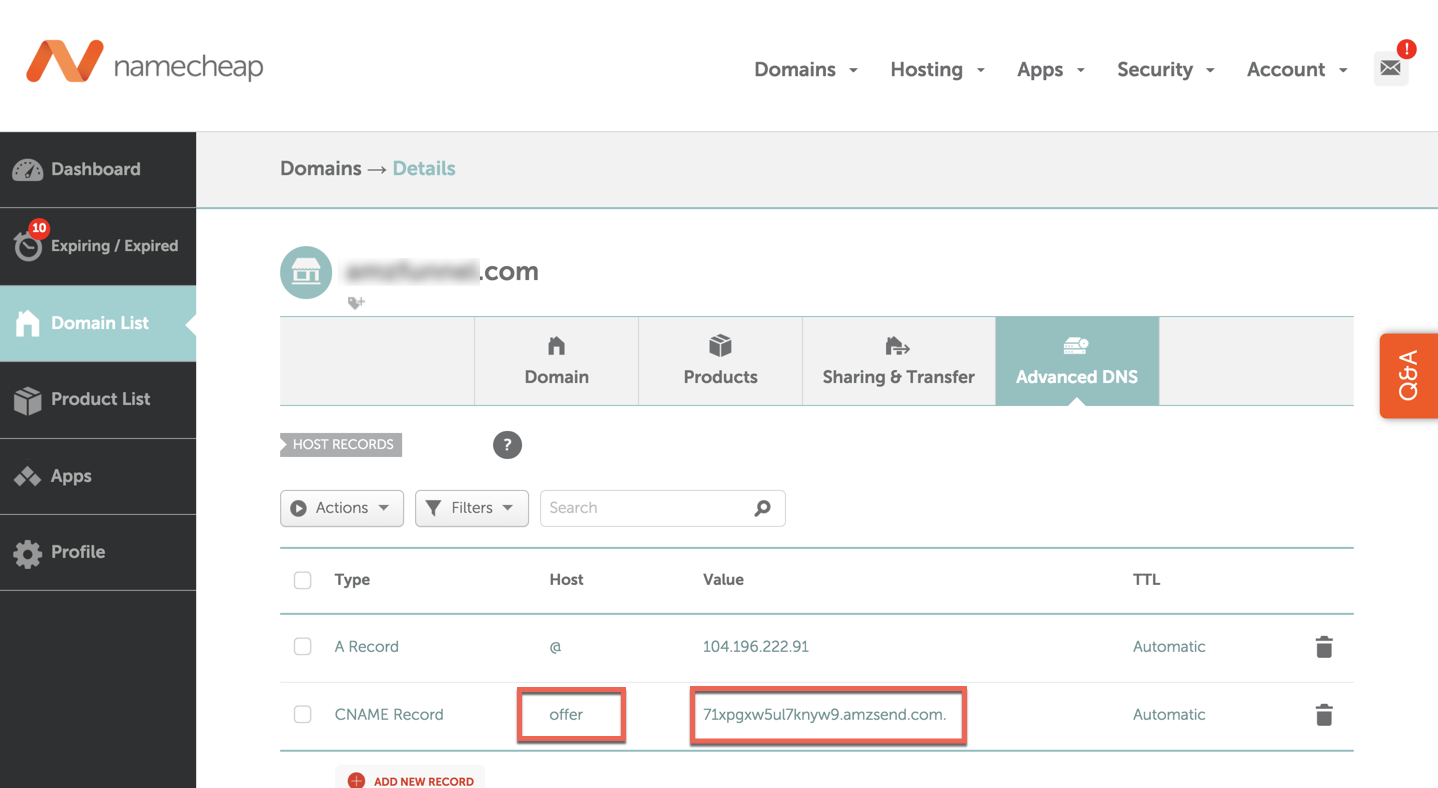
Here is example using Namecheap:
When you have done this click I Have Completed This Step.
Once you have done this we will have to wait for your DNS setting to propagate. Usually this take a few minutes but sometimes can take 24 hours depending on your provider. You can periodically press Check Status or refresh the page. When completed the text will change to Connected.

You have now successfully connected your domain with Landing Page Promoter.
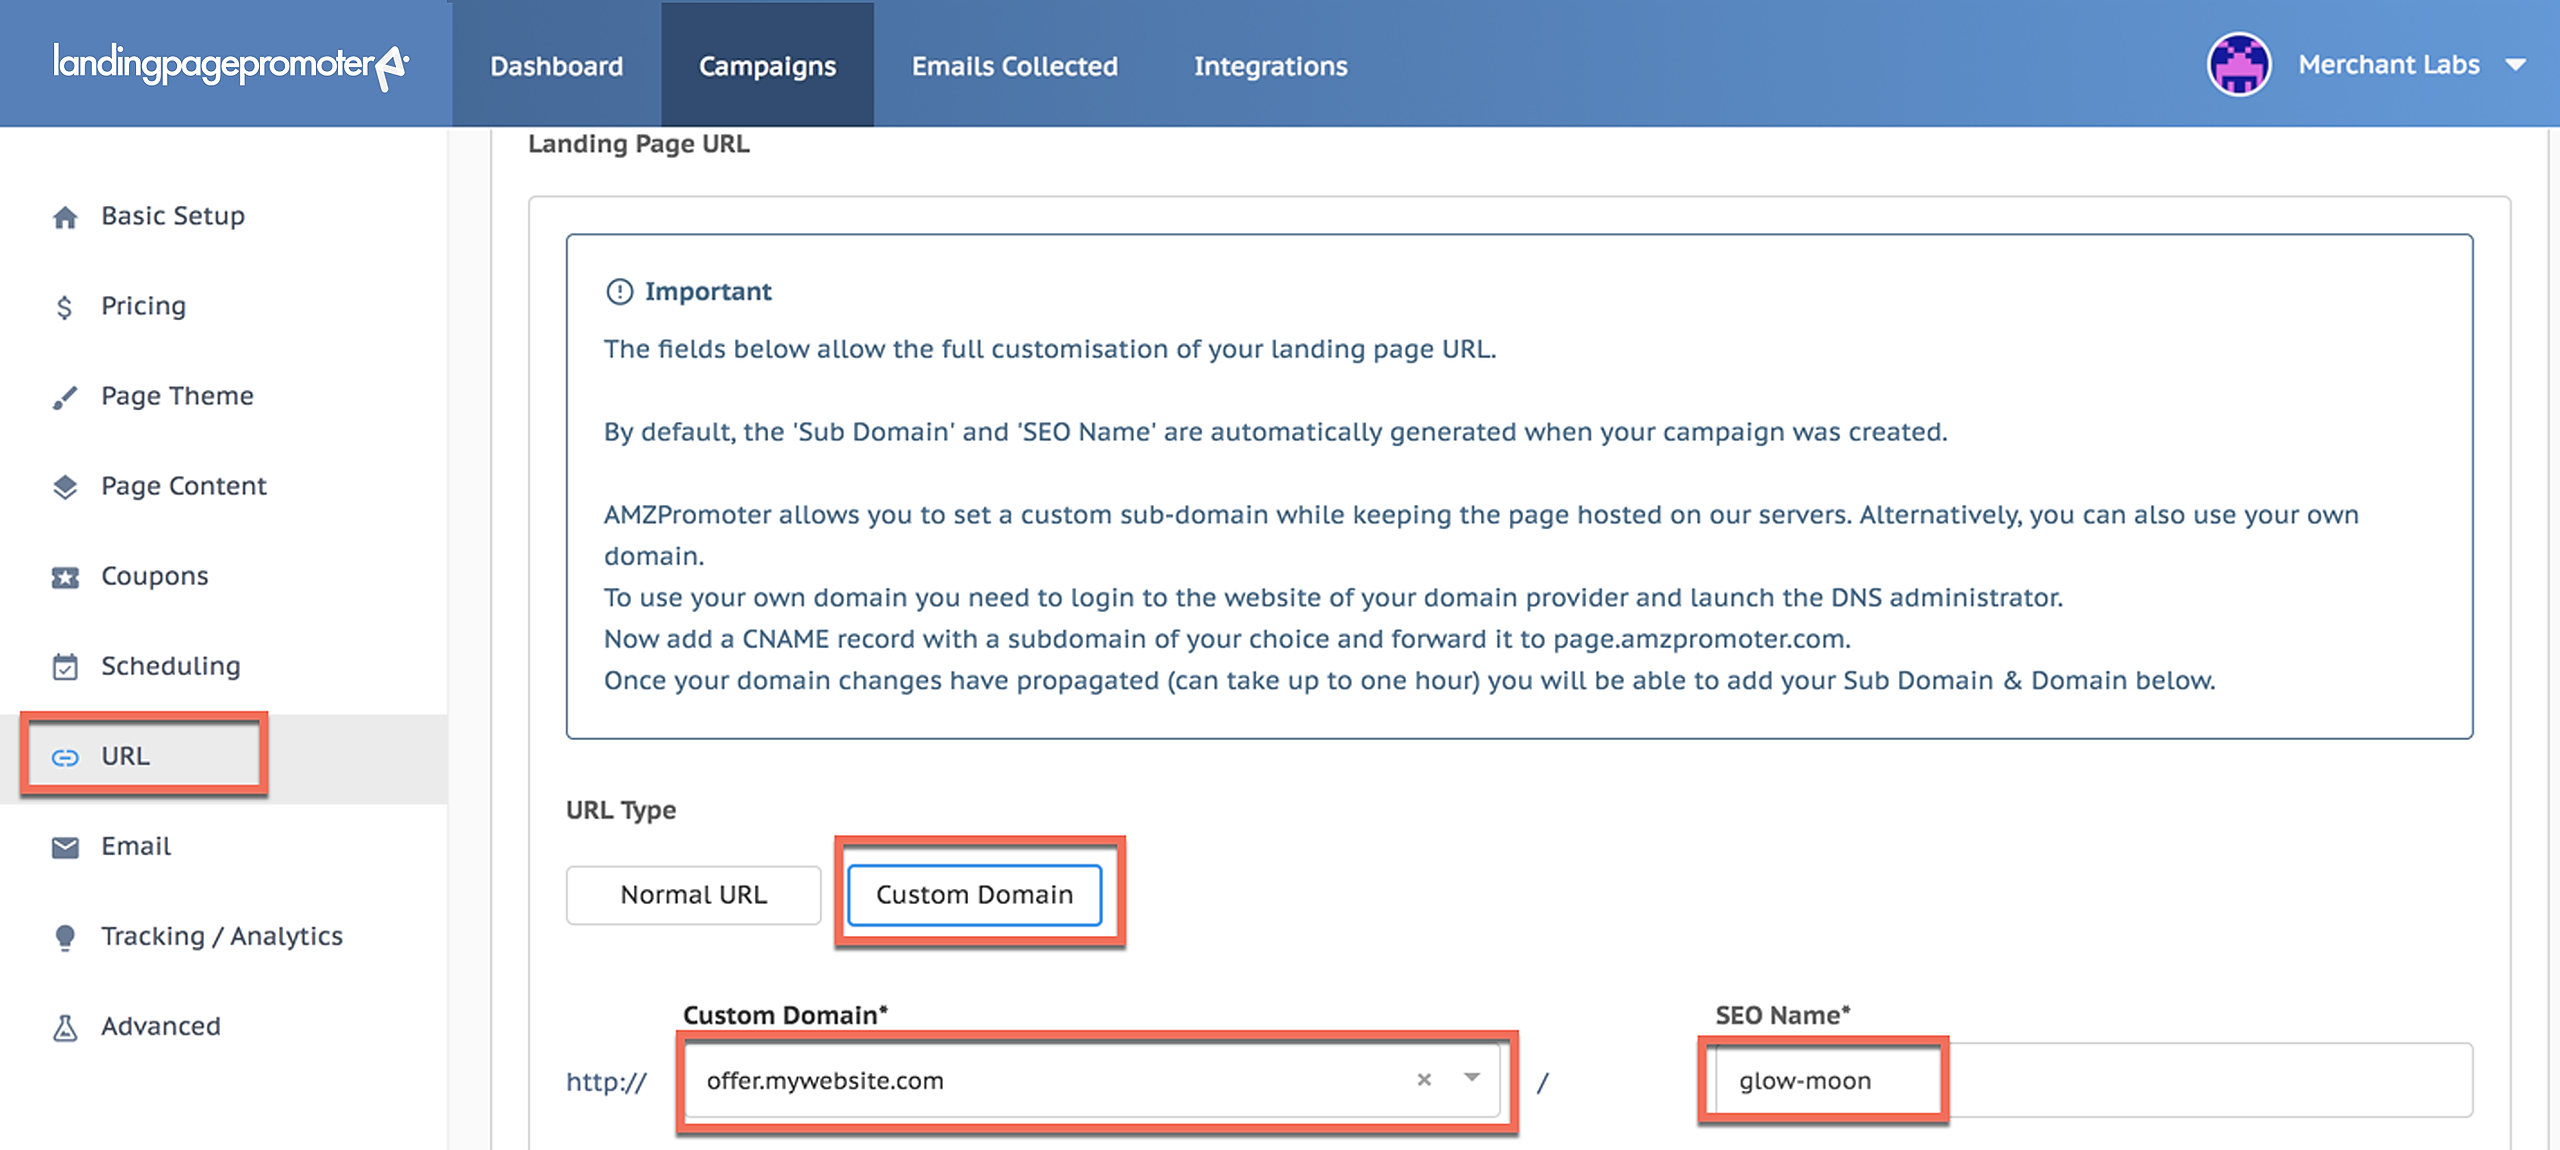
Step 2: Add a custom domain and URL path to an Landing Page Promoter campaign
Now that you have connected a custom domain to your Landing Page Promoter account all you need to do is select it and add a URL path when creating a campaign.
To do this go to the URL section in the campaign wizard, under the Custom Domain section use the drop down to select your domain and subdomain.
Then all you need to do is add the SEO Name (URL Path) and click Update & Next.
Your custom domain setup is now complete.
If you have any questions about your setup, please contact support by clicking the bubble on the bottom right hand side of the page.